Building your own shed might seem scary at first. But it’s one of the most satisfying DIY tasks out there. Need more space for tools? A quiet spot for hobbies? Or just want to learn basic woodworking? Knowing how to build a shed step by step gives you confidence. This guide walks you through everything. From planning to the final paint coat, you’ll make a shed that lasts years.
What “DIY Shed Building A to Z” Truly Means
Understanding the Full Process From Planning to Finishing
When people say “build a shed A to Z,” they mean the whole project. From the first drawing to the last nail, nothing gets skipped. It includes planning, measuring, buying materials, building the structure. And adding final touches like trim and paint too. Don’t guess your way through steps. A clear plan keeps you organized. It also stops you from getting frustrated mid-project.
This full process doesn’t miss any small parts. Every step matters for the final result. Take time to follow each part. It makes sure your shed is strong and useful. Rushing any step causes problems later. You don’t want that after putting in all the work.
Why Building Your Own Shed Saves Money and Adds Value
Store-bought sheds are easy to get. But they’re usually overpriced. And you can’t change them to fit your needs. Building your own saves hundreds of dollars. You pick the size, window spots, and how it looks. A well-made shed also boosts your property value. It’s both useful and a good investment.
Most store-bought sheds use cheap materials. They cut costs this way. These sheds break or wear out fast. When you build your own, you choose materials. Pick strong, durable ones that fit your budget. You’ll get a shed that works for you and lasts longer.
Planning Your Shed: Size, Location, and Design
Choosing the Right Spot and Checking Local Rules
Don’t grab a hammer yet. Walk around your yard first. Find a flat spot that doesn’t hold water. Check how the sun hits the area. Too much shade causes moisture issues. You also need to look at local rules. Or HOA guidelines if you have them. Some places need a permit. Others say how close the shed can be to property lines.
Think about how easy it is to get to the spot. Storing a lawnmower or garden tools? Don’t make yourself carry them far. Avoid spots near trees with big roots. Those roots grow and mess up the foundation over time. It’s a hassle you can skip with a good spot.
Watch the spot through different weather. Does it flood when it rains? Is it windy there most days? Answering these helps you pick the best spot. A good location makes the shed more useful. It also keeps it in good shape longer.
Picking the Best Shed Style and Materials for Your Needs
Sheds come in lots of styles. Barn-style, gable, lean-to—you name it. Think about what you’ll store inside. Garden tools? A mower? Or a small workshop? This tells you the ceiling height you need. And the door size and layout too. For materials, pressure-treated wood is best for framing. Metal or asphalt shingles work for roofs.
Live in a rainy area? Pick water-resistant materials. Asphalt shingles keep rain out well. Sunny area? Light-colored siding keeps the shed cooler. Want the shed to match your house? Copy the siding or roof style. It’ll look like it belongs there.
Don’t forget future needs. Will you want more storage later? Build a slightly bigger shed now. It saves you trouble down the line. You can plan for shelves or hooks too. It makes the shed more useful once it’s built.
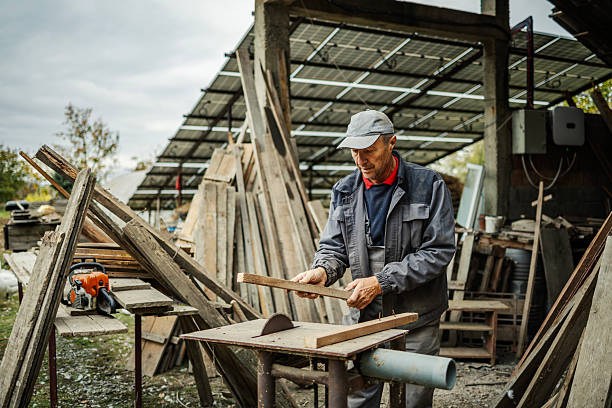
Tools and Materials You Need Before Starting
Essential Tools for First-Time Builders
You don’t need pro tools to build a shed. A tape measure, circular saw, drill—those work. Add a level and hammer, and you’re set. A speed square keeps angles right. Safety gear is a must. Gloves and goggles protect you. Borrow or rent tools if you want. It’s fine for a one-time project.
A utility knife helps cut things like roofing felt. A chalk line makes straight marks on lumber. These small tools don’t cost much. But they make work easier. Check your tools before starting. A dull saw or broken drill slows you down. You don’t want delays.
Keep tools organized in a box or bag. You’ll find what you need fast. No wasting time looking for a hammer. Having tools ready helps you stay focused. You can keep working without stopping.
Lumber, Hardware, and Optional Upgrades
Materials depend on the shed’s size. But you’ll usually need pressure-treated 4x4s. These are for the foundation. 2x4s work for framing. Plywood or OSB is good for walls. Pick the siding you like. Don’t forget nails, screws, and joist hangers. Roof shingles are a must too. Want extras? Add vents, skylights, or insulated panels later.
Check lumber for cracks or warps. Those make building harder. And they weaken the shed. Buy a little extra lumber. It covers mistakes, like cutting a piece too short. Use rust-resistant screws and nails. They hold up better against rain and moisture.
Optional upgrades make the shed more functional. Vents keep air flowing. No mold grows that way. Skylights let in natural light. You won’t need electric lights during the day. Insulated panels keep it warm in winter. And cool in summer. You don’t have to add them now—do it later.
Step-by-Step Guide: How to Build a Shed From A to Z
Building the Foundation and Floor Frame
Start with a strong base. Many DIYers use concrete blocks. Or a gravel bed for 4×4 skids. Get the base level first. Then attach floor joists. Cover them with plywood sheets. This step sets the tone for the whole build. An uneven foundation causes headaches later.
Take time to level the foundation. Use a long level to check all directions. Even a small tilt makes the floor uneven. Then walls are hard to put up. And doors won’t open right. For gravel beds, spread gravel evenly. Tamp it down so it doesn’t shift.
Walk on the floor frame once it’s up. Check for weak spots. If something feels wobbly, add extra support. You can put down flooring underlayment too. It makes the floor smoother. And protects plywood from moisture.
Constructing Walls, Roof, and Door
Build each wall on the ground first. Then lift it into place. Need windows or shelves? Add openings while building. Get the walls secure first. Then build roof trusses and attach them. Gable roofs are easy for beginners. They also give good headroom. Install the door frame early. Don’t forget the measurements later.
Use a level when building walls. Keep them straight. Mark where studs go before nailing. It makes walls strong and even. New to roof trusses? Follow a simple design. Or buy pre-made ones to save time. Space trusses evenly on the walls. It keeps the roof stable.
Installing the door frame early helps. Measure the door carefully first. Cut the frame to fit. Leave a little space around the door. It needs room to swing freely. Add hinges and the door once the frame is secure. No need to adjust later.
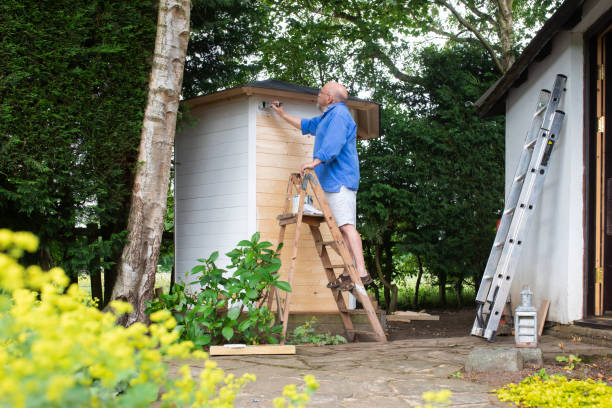
Adding Siding, Roofing, and Final Touches
Siding keeps the shed safe from weather. Take time to install it tightly. No gaps for rain or wind. Get the siding up first. Then add roofing felt and shingles. They keep rain out. Finish with trim around doors and windows. A coat of exterior paint or sealant helps. It keeps the shed looking good and lasting longer.
Start siding from the bottom. Work your way up. It keeps water from getting under. Use nails long enough to hit wall studs. For roofing, lay felt down first. Nail it in place. Then add shingles. Start from the bottom edge of the roof.
Final touches make the shed look nice. Trim covers gaps around doors and windows. It adds a polished look. Clean the siding before painting. Dirt messes up the paint. Use exterior paint made for your siding type. A second coat adds extra protection.
Common Mistakes to Avoid When Building a DIY Shed
Structural Errors Beginners Often Overlook
Skipping the level check is a big mistake. Even a small tilt makes doors stick. Using untreated wood for the base is bad too. It rots over time. Follow your measurements closely. Guessing messes up the whole structure. You don’t want to start over.
Not securing the frame right is another error. Walls or trusses need tight nails. Loose ones make the shed weak. Wind can damage it easily. Make all connections tight. Use extra nails or screws at corners and joints. It adds strength.
Forgetting floor support is a problem. Heavy things like lawnmowers sag floors. Add extra joists under heavy storage areas. It keeps the floor strong and level for years. No costly fixes later.
Tips to Make Construction Easier and Safer
Work slowly and check your cuts twice. Don’t lift heavy frames alone. Ask a friend to help with walls. Keep your work area clean. No tripping over tools or lumber. These small steps make the process smoother.
Wear safety gear every time. Gloves stop splinters and cuts. Goggles keep dust out of your eyes. Closed-toe shoes prevent nail piercings. Never work with tools when tired. Tiredness leads to mistakes and accidents.
Take breaks during the project. Building a shed takes time. You don’t have to finish in a day. Breaks help you stay focused. You can check your work too. Fix small issues before they get big.
Final Checklist and Long-Term Maintenance
What to Inspect Before Calling It Finished
Walk around the shed and check siding gaps. Look for misaligned shingles or loose screws. Open and close the door. Make sure it swings easily. Check the roof overhang. Is it even? Make sure all exterior surfaces are sealed. No moisture gets in. A final inspection saves trouble later.
Check the inside of the shed too. Look for sharp edges on the frame or shelves. Sand them down to avoid cuts. Test shelves and hooks. Put a few tools on them. Make sure they hold weight. You don’t want them breaking later.
Ask someone else to look at the shed. Fresh eyes spot things you miss. They can check if it looks even from all angles. Their feedback helps with final adjustments. You’ll be happy you asked.
How to Keep Your Shed in Top Shape for Years
A well-built shed needs simple care. Clean gutters if you added them. Repaint or reseal every few years. Check for pests or moisture. With good maintenance, it stays strong for decades. Your DIY work is worth it.
Check the foundation every year. Look for cracks or shifting. Fix issues right away. It prevents bigger floor or wall problems. Clear debris around the shed. Leaves and dirt hold moisture. They cause siding rot.
Keep the inside organized. Don’t pile heavy things in one spot. It stops the floor from sagging. Use shelves or bins for small tools. It keeps the shed tidy. And protects tools from damage. Open the doors every few months. Let air flow to prevent mold.